


....Gaya ShilaShower
# Please bear in mind that this might not be the correct steps of doing it. But who cares? As far as I'm concern, so long it turns out to be a bunga pahar, this is fine enough to me. Hehehe~~ (So, don't claim that I'm giving you guys ajaran sesat ke ape tawuuu...) ![]()
So yer puan2, miss2, kakak2 adik2 dan para hadirin sekalian, bahan2 nya untuk membuat bunga pahar dip adalah seperti di bawah:-
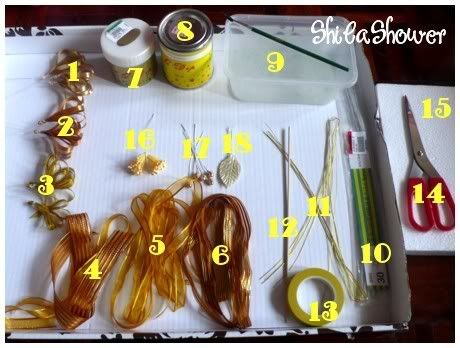
Diskripsi bahan2:
[1] 1/4 inch. ribbon (3 sets) So total of 9 of 1/4 inch. ribbons. The length &
[2] 1/4 inch. ribbon (3 sets) color adalah mengikut sesedap rasa hati. If you
[3] 1/4 inch. ribbon (3 sets) can mix up the tones, that will be better. :)
[4] 1 inch. ribbon Later to tie the gold egg (plastic maa, ribbon will do).
[5] 1/4 inch. ribbon (3 sets) Measure the length secukup rasa. Mine is
[6] 1/4 inch. ribbon (3 sets) 18 inches, so merambu-ramba sikit. Hihihi
[7] One bottle of dip Keep in cool dry place and avoid direct sunlight.
[8] Strengthener Name might be wrong, but the use is as the name goes.
To strengthen the surface.
[9] I don't know the name. Looks like sugar thingy and I sprinkle it on to
the petals (dip).
[10] Wire size 30.
[11] Gold wire
[12] Stick a.k.a lidi.
[13] Tape
[14] Scissors
[15] What this board name? I can't recall it now. Huhuhu
[16] Flower buds
[17] Flower buds
[18] Leafs
So, the making goes like:-
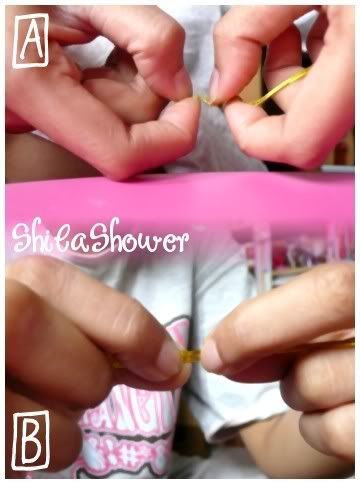

[A] The gold wire is approximately 34inches long, so please cut it into 3 (equally). One petal will only need 11 inches.
[B] You can actually choose any designs that you like to shape the petal. (Apa saje jenis bunga yang anda reti nak bentukkan. Hihihi). Referring to the one I did, I just shapped it using my nails. As in fingertip lah kan. (You may not want to do this, kerana kuku telah bengkang-bengkok just like the petal. Hehhe. *I need spa manicure soon.)
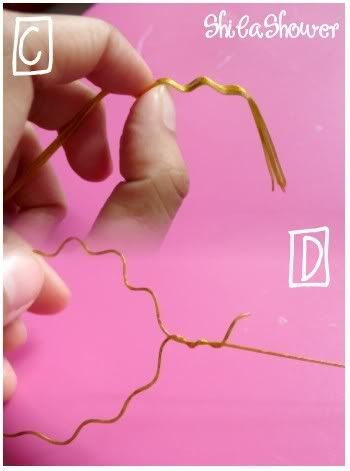
[C] Once you done with the shaping (like me with the wavy looks petals), you may need to refine it using your fingertip. This is important to ensure that all are in the same size and shape.
[D] Ditto.
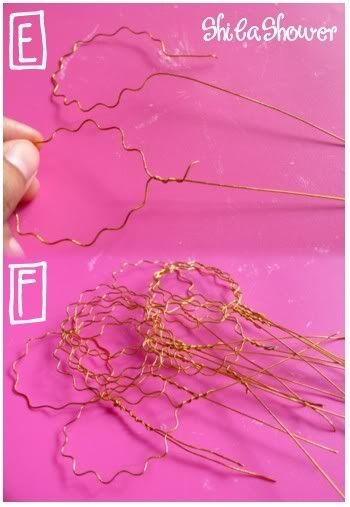
[E] Sile sambung/lilit kan the short end to the long end. (I don't know how to explain this, but mine is tied up nicely. Hehehehe)
[F] The petals. I'm using 9 petals for one stalk of bunga pahar. Wonder how many that I've made? (Hurmmmm, 9 x 170 = 1530 petals!) I'm done with this anyway. Good good. :)
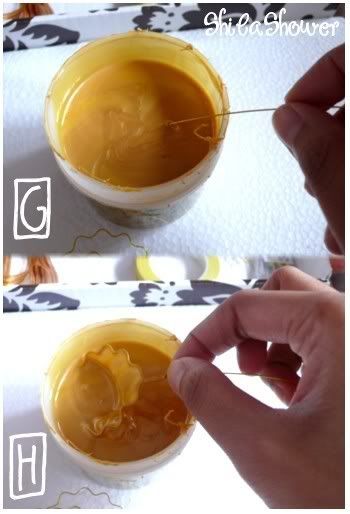
[G] & [H] Deep dive kan petal2 itu. Don't do the putar, jilat celup thingy from Oreo itu. Hanya celup sahaja. Hihihi. (First attempt might not gives you a good result, sile cube berulang kali sampai dapat skill itu.) ![]()
[I] & [J] Angkat dan tos kan dulu yer. And I impale it to that "I-can't-recall-the-name-soft-board" in order to dry it.
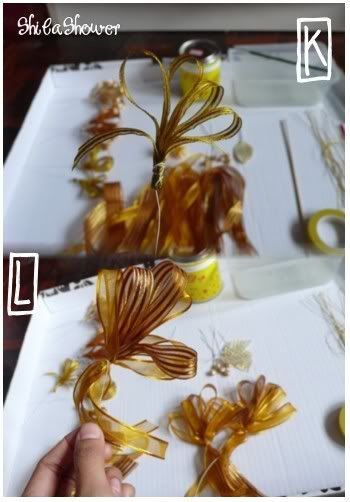
[K] & [L] These are the ribbons that I've made into sets. Once the petals are dried, you can just arrange and tie everything to the lidi stick. (Sehingga ia menjadi bunga pahar). Start to arrange the petals, than the flower buds, followed by the 1/4 inch. ribbons and lastly 1/2 inch. ribbons.
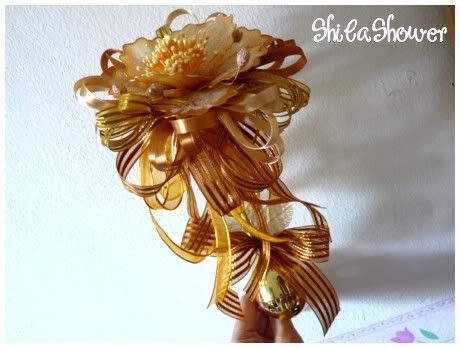
Tadaaa!! The final output. I don't care if this doesn't look good, like those made by professional wedding planner, but I'm more than happy with this. Adalah kan rupa bushy goldie bunga pahar tu kan? Heheheeh.
So, OK lah kan? Setakat ini rancangan kita pada hari nih, kita jumpa lagi di lain waktu (which don't know when), dalam rancangan Bunga Pahar Cik Bedah. Heheheh. So stay tune at shilashower.blogdrive.com.


Terima kasih sudi kongsi ilmu! ;)
ReplyDelete